|

|
Please
remember that these images remain the intellectual property of
The Docherty Family and may not be used without permission. This
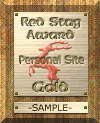
tutorial is intended as an instructional piece featuring
Photoshop 5.5 techniques that can be used for other graphic
efforts and to illustrate the construction of these particular
awards.
Copyright
© 2001
All
rights reserved. |
|


CONSTRUCT
THE PLAQUE AND ADD DETAILS

 Since
you have created separate files for the individual elements, we now have
to combine these into a master file that will become the final award
image. Since
you have created separate files for the individual elements, we now have
to combine these into a master file that will become the final award
image.

In
these steps, we construct the award plaque and add details to complete
the overall illusion.

|
Using
the file created to form the beveled wood base, drag the other
completed layers. Set the main plaque first to establish center
and allow for adequate spacing below. |
 |
 |
|

|
|
Now
add the name plate. Link these two layers and align with the
upper plate (Layer>Align Linked>Horizontal Center). |
 |
 |
|

|
|
We
prefer to attach our plates with screws instead of glue. In a
separate file, create a 1-square pixel image the same color as
the text and emboss the layer. Drag copies of that image to
the four corners of the main plate and on each side of the
name plate. |
 |
 |
|

|
|
Since
the plates have a certain thickness, we have to add a shadow
to simulate this depth (Layer>Effects>Drop Shadow). The
plates are fairly thin, so don't overdo it here. A distance
of 2 and a blur of 2 works well. |
|
 |
|

|
|
The
image is now complete and ready for personalization. Choose a
readable font when rendered (Verdana works well) and size
based on need. Optimize the image and save as a jpeg file (the
wood and brushed surface detail may be lost as a gif file.) |
|
 |

|